Thursday, January 16, 2014

Malcoholics rejoice!

Fear not, fellow and future ex-expat boozehounds: I have perfected my delicious, boozy, and very replicable formula for honey makgeolli! Below is a shot of brown sugar makgeolli and wildflower honey makgeolli.

For those who have never sampled/heard of/gotten trashed in Korea on makgeolli, it's a tasty tasty rice wine which is not at all like sake (which most people immediately ask me to compare it to). It's milky in colour, slightly sweet, a little bit carbonated, and super habit forming. It's unlikely that you'll find a palatable bottle in many North American liquor stores as the good stuff has a very short shelf life due to its probiotic nature. You may be able to find it at some Korean restaurants and specialty bars - or you could just make your own. As far as brewing goes, it's easy and cheap.


My primary brewing resource was mistermakgeolli.com, although....me lazy, so I took a few liberties with ingredients and shortcuts and all seems to have turned out just fine. There is a lot of discussion with regards to method and ingredients on various brew forums, I read as much as I could and ended up doing what I figured was the bare minimum for a decent batch of mak. For your benefit, I'll first distill a little bit of my newly gathered knowledge on some of the makgeolli essentials. If you're new to home brewing, you should probably give it a read. If you just want the recipe, skip this next chunk and just scroll on down to the ingredients list.

1. Nu-ruk 

누룩

If you're brewing outside of the ROK, this is definitely going to be one of your limiting factors. I've read some threads on brew forums where people tried subsitutes using amylase and other types of brewer's yeasts, but I steered clear of this option after reading a little about the analysis of nuruk's microflora, which happens to include a total of 64 bacterial species, 39 fugal species, and 15 yeast species. Inclusion of all these species is not universal to all nuruk sources (durr), the primary common microbial agents appear to be Bacillus amyloliquefaciens, B. subtilis, Lichtheimia corymbifera, Pichia jadinii and some kind of saccharifying fungi. I suppose you could play around with commercially available brewing cultures to try and best determine which will impart the best mak-esque flavor by brewing batch after batch of questionable rice wine, but c'mon now.


So I went on a quest for nu-ruk in Vancouver. H-mart didn't have it, nor did 3 other Korean grocers I tried. Unsuccessful attempts were made to order online through g-market, and I couldn't find another English source for the stuff. If you've got somebody handy who is great with hangul perhaps you could find another Korean supplier online, but my Korean is embarrassingly poor. Finally, FINALLY I found a supplier through the warehouse that imports for Hyundai Oriental Market (
3488 Kingsway). So there, that's where you can find this stuff in Vancouver.
If you happen to live in America, suck my balls because you can skip all of that fuss and just order it online --> here <--

You'll also need some more conventional yeast to help it along, but that's pretty piss-easy to find. I've heard of others having success with regular ol' baker's yeast, however I used some brewer's yeast I had left over from cider making.  


2. Equipment


Makgeolli is a fucking cakewalk if you've ever brewed anything before. You'll need

  • a large jar with a wide mouth (10 litres is a good size, glass cleans better than plastic) 
  • bottles which can withstand pressure. The makgeolli will carbonate itself in secondary fermentation, so be sure to use something like plastic soda bottles or beer bottles which can withstand the pressure.
  • cheesecloth and rubber band - just to secure over your large jar to keep nasties out.
  • muslin bag (jelly straining bag) - you CAN strain your makgeolli with a cheesecloth or fine sieve, but I find it so much easier with the bag.
  • funnel, ladle, etc - for bottling.
  • stirring thing - for stirring.
2. Sanitization
Zedomax boiled all of his equipment, mistermakgeolli disinfected tools and washed his hands in soju, and I totally did none of this. Keeping things clean is always good, but you're not scrubbing up for surgery. In my experience with makgeolli, wine, and cider I have found that the microbial culture is pretty goddamned aggressive, particularly in the state of primary fermentation. You're not exactly leaving a petri dish of agar out for competing microbes to take over. Years ago grain fermentation was helped along by farmers chewing mouthfuls of rice which would then be spat into the mash (blech), and analysis has shown that nu-ruk often contains small amounts of food borne pathogens such as B. cereus or Cronobacter sakazakii anyways. Despite all of this, the yeast, fungi, and lactic bacteria will take over to produce the makgeolli we know and love. If anything, I save the thorough cleaning work for bottles - you want to disinfect things to keep the good cultures in your brew which are now settling down from the turbulent stage of primary fermentation. So here are my lowest-common-denominator rules for sanitation:

  • Wash your hands, bowls, spoons, etc well with hot water and soap.
  • Keep bugs out. Fruit flies carry acetobacter, which will spoil your whole batch by turning your tasty wine into vinegar. Avoid this by always keeping cheesecloth secured over the mouth of your primary fermentation vessel.
  • Sanitize bottles for secondary fermentation. ... once again, me lazy, so I just run the bottles through my dishwasher with sani-brew instead of dish soap. Works great! Alternately you could boil them, or put them in a large tub of sani brew (or some other food safe disinfectant). 
That being said, there's nothing wrong with erring on the side of caution and disinfecting everything. It's too much of a ball ache for me, but it'll better ensure that your brew won't get contaminated.

3. Brew time
This is highly subject to both the mash as well as temperature. I've read anything from 4 days to 2 weeks with makgeolli, but I've personally never needed more than a week for primary fermentation. You'll see your brew go from a bubbling porridgey slurry to a stratified jar of boozy liquid and sediment. I got really lazy with my last batch and ended up leaving it be for nearly 2 weeks in primary fermentation without any noticeable difference or problems with the final product. It's pretty forgiving. Secondary fermentation (after bottling) takes just a day or two in a warm room. Be sure to have ample space in your fridge to store the finished product as cold temperatures are needed to drastically slow down fermentation once you have a product you want to drink. 


막걸리!!!
5 cups uncooked short grain rice
2 litres of water for primary fermentation, additional 1.5 litres for bottling
1 cup nuruk
1 tbsp brewer's yeast
2 cups honey

Wash your rice well, and cook it as you normally would. Then set aside to cool. I've read that you need to wash the rice 30 times - nuts to that, I wash it out 5 times maximum, the runoff water seems clear enough to me. I've also read that you shouldn't cook the rice all the way through, it has to be a particular kind of al dente - nuts to that, it's always turned out just fine after regularly cooking in my rice cooker.
So there's my lazy opinion and experience getting around rice pickiness


While the rice is cooling, soak 1 cup of nuruk in 1 cup of warm (not hot!!) water. I do this to soften the chunks which i eventually squish apart with my fingers. Alternately, you can grind it up dry with a mortar and pestle, coffee bean grinder, whatever.


Add the cooled rice, nuruk, brewer's yeast, and 2 litres of water to your large jar for primary fermentation. 


Mush it around well with your clean hands so it's all well mixed and your rice takes a bit of a beating.


Cover the jar with clean cheesecloth and secure in place with a rubber band. 


Leave it to ferment in a dark, warm place. I just ferment it under my table in the living room, so I always wrap a thick towel around the jar to keep the stuff insulated from drafts and light. 


After the first day your mash should look like a nasty, bubbling porridge.


Stir the concoction well once every day with a clean spoon to aerate the mash. 

After about 5 days your makgeolli should have topped out at around 16% abv, and the smell should have gone from yeasty to good and boozy by this point. The amount of time may vary by a few days depending on the temperature of your brewing environment, but it should look like the photo above.


Strain the liquid through a mesh bag (cheesecloth, jelly strainer, whatever), and discard the mash. Do it SLOWLY as the rice pulp will quickly clot your strainer. While trying to massage the mesh bag to express more liquid, my roomie remarked that it's best to pinch and roll away the sediment on the inside of the bag. Apparently, "it's just like scratching my balls, which probably why I'm so good at it." Les mots justes, Peter. 


Add 1.5 litres of water and the honey to the strained makgeolli. Just before adding the honey I like to warm it up a little bit on the stove or in the microwave to thin it out and make it easier to blend. Be aware of the type of honey you use, as the rice wine will carry it's flavor. My favorites to use are wildflower and lemon blossom.


The wine will be quite sweet at this point, however it will ferment a little more once bottled. This allows the beverage to get slightly carbonated and a little boozier as the remaining microbial culture metabolizes some of the honey into even more alcohol.


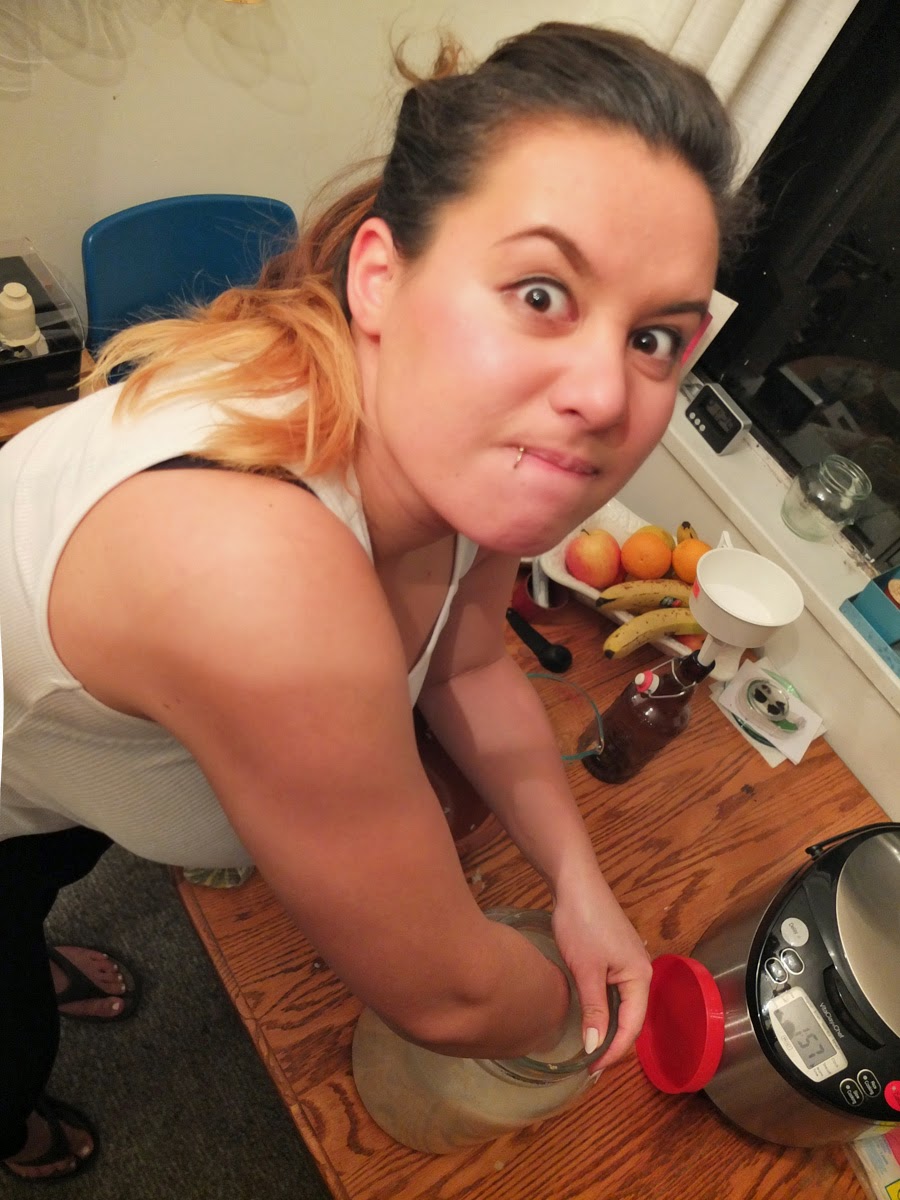
Funnel the makgeolli into your bottles, but leave a generous gap at the top to allow for fermentation. You can see how I filled mine below.


Keep your bottles at room temperature for another day or two.  When it is left at room temperature I would highly suggest gently bleeding the gas from the bottles once a day (or leaving caps on loose) lest you do what I did with my first batch and send a solid stream of highly carbonated liquid straight up and all over your ceiling. After a couple of days you can move them into the fridge to slow fermentation - it's now ready to drink. Putting the makgeolli in a cold place will SLOW fermentation, but not stop it. It's best to drink this stuff within a week of making it (although it apparently keeps for about 2 weeks). If you find it too boozy or perhaps sour when you go to enjoy it, just dillute with more honey and water to suit your tastes. 
Unlike other wines, makgeolli doesn't benefit from being left to age - in my opinion it tastes best as soon as it's ready to be consumed. Be sure to gently agitate the bottle prior to serving; you want to mix in the sediment for a better taste and that nice, milky look.


I suggest you experiment with sweeteners and flavoring. In Korea most commercial makgeolli uses artificial sweetener, and is sometimes flavored by adding blended fruit just prior to serving. I tried different types of honeys, sugars, and spiced syrups which yielded some of the best mak I and my fellow ex-pat mak-enthusiast Steve have sampled (his frank assessment, not just mine!). Flavoring is definitely best done after primary fermentation, as compounds in flavoring agents may interfere with the initial boozy process.


Alright, that's all. You can go and get wasted now.  


Sunday, June 23, 2013

Korean Peach Season? Cake for Breakfast.

...because friends make mimosas and cake sound like a pretty good idea at any goddamned hour.


Peach and Almond Upside Down Cake
with Lemony Topping

Cake:
-3-4 peaches
(whatever it takes to cover your baking dish)
-1/2 cup almond meal
-1/2 cup + 2 tbsp flour
-1/2 tsp baking powder
-1 tsp cinnamon
-1/4 tsp salt
-1/2 cup sugar
-6 tbsp butter
(at room temperature)
-1 tsp vanilla
-2 eggs
-1/3 cup plain yogurt

Syrup:
1/4 cup brown sugar
1/4 cup sugar
2-3 tbsp water

Lemony topping:
-1 cup cream cheese
-3 tbsp milk
-2 tbsp lemon juice
-1 tbsp lemon zest
-3 tbsp sugar


This is a pretty quick one, so start by liberally greasing a 9 inch cake pan with butter and preheating your oven to 350 degrees. Peel and slice your peaches into wedges, and arrange them however you like to mostly cover the bottom of the pan. Now we've just got to get the batter and the syrup sorted out.


Batter:
Sift the flour, salt, cinnamon, and baking powder together into a bowl. Mix the sifted stuff in with the almond meal, and set it aside while you get the wet stuff ready.

In another larger bowl, cream the sugar, butter and vanilla together until smooth. Mix in the eggs one by one, and then stir in the yogurt. Dump in all the dry stuff and mix the lot just enough to get it all sludgy. Don't try to get it perfectly smooth, it'll always look a little weird thanks to the almond meal. Set the batter aside for a few minutes while you make the syrup.

Syrup:
Put both the sugars in a small pot over high heat with about 2 tbsp of water. You don't need to stir it or anything - just allow the sugar to melt down into a syrup. It'll only take about 3 minutes, at which point  you can turn off the heat and spoon it all over the peach slices in the cake pan.


Spread the batter on top of the syrupy peaches and bang the pan on the counter to settle the batter between all the slices. Stick it in a hot oven for about 30 minutes (or until a toothpick inserted to the cakey-part comes out clean). Once baked, allow the cake to cool in the pan for around 10 minutes before trying to invert anything.

While the cake is cooling, zest a lemon by using a grater or carefully cutting the peel off the fruit (NO WHITE PITH!) and mincing it finely. Whisk that together with the cream cheese, milk, lemon juice and sugar until smooth. If you want the topping thinner, just add a little more milk until it reaches your desired consistency. If it's not quite lemony enough, add more lemony things. If it isn't sweet enough, add more sugar. You get the idea.


By now the cake should still be warm but not scalding hot, so place a large plate over the pan, and carefully flip the entire thing over so that the cake splops out onto the plate.


Serve warm with a generous dollop of lemony cream cheese and eat it for breakfast like the shameless fat kid you are.


Sunday, June 16, 2013

Compensatory Duck Fat and Brandy

Sigh, requisite apologies are in order for being such a terribly negligent gastroslut. I moved to a magical land where one can fritter their time away in public saunas, and the excessive consumption of alcohol is accepted - nay, encouraged! So really, my absence should come as a surprise to nobody. 

Sorry pals, here's a little something to tide us all over until I morph back into a responsible adult:

...aahahhahah, GOOD ONE ALI!!!

Good Greasy Greens:
Duck, Mushroom, and Spinach Saut
é

-3 cloves garlic
-1 yellow onion
-8 oz smoked duck breast
- 5 cups spinach
- 6 cups mushrooms of your choice 
(I did shitaake, oyster, and button)
-1/3 cup brandy
-pepper+salt to taste
-1/4 tsp hot chili flakes.

Really, all this dish involves is sequentially throwing things in a hot pan to get brown, but I will elaborate for the curious.

start by NOT WASHING THE GODDAMN MUSHROOMS and NOT ADDING IN ANY SALT UNTIL THEY ARE DONE BROWNING. Brush them or wipe them, hold on the salt - doing otherwise ensures that they flood the pan with water and don't brown as quickly.

Mince the garlic, dice the onion, and chop the mushrooms to whatever size you like - same goes for the duck and spinach. You should know that all of my amounts are pretty approximate and very flexible...meaning that I did a shit job of remembering to measure things before I stuck them in a pan.

Now the cookery: put a large pan over high heat, and fry the duck until crisp and brown. Remove the meat and set it aside for now. Also remove most of the rendered fat from the pan - keep about 3 tbsp in, and set the rest aside for other purposes. 

Add the mushrooms to the hot duck fat and fry until nice and dark. You don't need to stir constantly, just shovel it around every couple of minutes and repeat until thoroughly browned. Add the onion + garlic to the mix, and stir often until the onion bits soften and go a bit translucent. Pour in the brandy (cheap is fine, I used the last of an $8 bottle from Christmas) to deglaze the pan. Finally, lump on the spinach and allow it to wilt for a minute or two. Give it all a  quick mix and allow the greens to cook for a couple more minutes. Throw in the chili flakes, and season with salt and a generous amount of pepper  to taste. Boom, you're done.

....Sort of. It's very tasty as a side or as a savory crepe filling, but I like it atop noodles best. Toss some freshly boiled pasta in a tablespoon or two of the rendered smoked duck fat from earlier, liberally dole out some of the sauté, and cream your effin' pants while you down it like a champ. I'm sure this concoction would also work great with thick slab bacon in lieu of the duck. Enjoy until I sober up long enough to post again!

Sunday, March 10, 2013

Dahl Soup for Dull Days

After a nice long period of wallowing in disposable income, vacationing abroad, and hosting my lovely man-friend in Changwon, I'm back to a far less thrilling reality. Damn.

No money means no meat, so here's a simple recipe for my mom's dahl soup which is tasty, really cost effective, and pretty easy to make.


Dahl soup

-2 cups split red lentils
-1/3 cup chickpea flour
   (aka gram, besan, chana dal flour)
-10 cloves garlic, minced
-3 inches of ginger root, peeled and minced
-2 large onions, diced
-2 tbsp turmeric
-salt to taste
-1 tsp black pepper
-1/2 tsp chili flakes
-3 tbsp butter
-3 tbsp olive oil

This recipe has 3 main steps: brown, boil, and fry. First, we brown; you need to roast both the chickpea flour and the lentils prior to cooking the soup (but not at the same time!). This will give the dish a better, fuller flavour - necessary when something savory lacks tastytasty meat and cruelty. In a dry pan over high heat, stir the chickpea flour constantly until it browns in color - this shouldn't take much more than 5 minutes. Set the flour aside and get your soup pot.


Place the pot over high heat and roast the lentils until they yellow. You might notice a few dark brown or black ones - no biggie. Just keep stirring.


Once the lentils are sufficiently roasted, pour in roughly 6 cups of water to stop the browning. Add in the minced ginger and turmeric, bring it all to a boil, then reduce the heat to medium-low and simmer the concoction covered until the lentils are soft (about 45 minutes).


While your lentils are cooking in the pot, melt the butter into the oil in a pan. Fry the onions, garlic, and chili together over medium-high heat until the garlic is browned and the onions are soft. Once that's done, turn off the heat and set the pan aside for a bit.

Back to the soup pot: when your lentils are soft it's time to add in the toasted flour. Gradually whisk the flour into your lentil goop until well incorporated. Don't worry if there are a few little lumps. Toss in the fried things and all of the fat you fried them in, along with enough water to get the soup to your desired consistency. I usually end up throwing in an extra 6 cups because I like it fairly thick, but you can always add more if you like. Add in the pepper and salt to taste and allow the whole pot to return to a boil. Turn that shit off and leave it to mellow for a few hours - in my experience, it always tastes better the next day.

I think it's particularly nice topped with a bit of freshly chopped cilantro and a quick squeeze of lime. I, however, do not have either readily available; far-less-thrilling-reality, indeed.


Saturday, January 5, 2013

Curry


No long introduction - it's cold as tits in Korea, and all I want to do is sit on my ondol in a pile of blankets warming my insides.

It'smotherfuckingcurryseason.

Curry is great because lazy people like me can throw ridiculous quantities of delicious things into a large pot and have meals for a solid week, thus reducing the number of times one must leave their bed to succumb to the tedium of ...uh...not being in bed. Please enjoy my climatic coping strategy:

Pork and Cardamom Curry

-4 cups diced kabocha squash
(butternut or acorn varieties would be ok)
-1 heaped tbsp garam masala
-1.5 tbsp cardamom pods, whole
-1 tbsp black pepper
-2 tbsp chili flakes
(or to taste)
-4 inches ginger root, peeled and minced
-2.5 kg pork shoulder, cut into strips
-15 cloves of garlic, smashed
-5 medium onions, sliced thinly
-2 tbsp oil/fat/whatevs.
-1 can coconut milk
-1 tbsp salt, or to taste


I'm not gonna lie...this recipe involves some pretty annoying (but worthwhile) prep work. The first step is extracting the cardamom from their shells. I've found it best to squish them with the side of a knife, and then rub the pods between your fingers to ease the little rat-poop-esque grains out. I've tried to get around this by using ground cardamom as well as steeping the cardamom pods without husking them - both to less satisfactory results. Having the whole seeds in there really gives your maw strong pops of cardamom gusto. This is particularly great because they will sharply punctuate the other strong flavors in this recipe instead of just blending in with them. Skip this important (albeit crappy) step and you'll be making a very different curry.


10 agonizing minutes later you'll have your little pile of fragrant turds. Now you dump them, the chili, pepper, and masala in a large pot over medium heat with the fat of your choice to toast up a bit. After a minute it should be really fragrant, at which time you can add in your onion, garlic, and ginger. Mix it up well and sweat the whole lot for about 5 minutes over medium heat. Now add in your pork, mix well, cover the pot and continue to cook over medium heat for about 10 minutes.


At this point you'll notice that the ingredients have released a lot of water - that's good. If they haven't, cover it up again and leave it for another 5 minutes. Add your squash and coconut milk into the bubbling mess and cook it for another 45 minutes over medium-low heat (keep it at a low simmer). Be sure to give it a stir every 15 minutes or so to make sure that nothing is sticking to the bottom of the pot.

Uncover the pot, add in the salt, and reduce the lot for another hour (or until desired consistency is reached) over medium-low heat. I like this curry nice and thick, so I tend to boil most of the liquid out. Taste the batch, and only add more salt (if needed) AFTER you have reduced it to your liking.

By this point most of the squash, onions, and garlic will melt together with the coconut milk into a thick delicious sauce, both pungent and sweet. Prepare your mouth for tender, flavorful pork and the worst goddamn breath you've ever had in your life.