Tuesday, July 24, 2012

Plumble


Well I'm still waiting for the rain to stop in order to take some proper photos of grilling and burger related things, so I thought that in the mean time I'd post something else to keep you lot enthralled. This is a super simple dessert, awesome to throw together for irritatingly unannounced guests and welcome company alike. It works great with most any juicy fruit, however my Polish roots leave me partial to plum which is currently in season.

Easy Plumble

crust:
-1 cup almond flour
-1 1/3 cup 9 grain mix
  (or rolled oats if you can't find any)
-1 cup all-purpose flour
-3/4 cup butter
-3/4 cup sugar
-1 egg
-1 tsp baking powder
-1/4 tsp salt
-1/2 tsp cardamom

filling:
-4 large plums
-3 tbsp sugar
-2 tbsp flour
-1 tsp vanilla


Pre-heat your oven to 375 degrees and get going on the crust. Combine all of the flours and 9 grain mix in a large bowl with the baking powder, salt, sugar, and cardamom. Melt the butter and whisk together with the egg. Add the wet stuff into the dry stuff and mush it around until you get a crumbly dough. Set it aside and grab your plums for the filling.
Wash and cut the plums into slices. They can be kind of a pain in the ass to get off of the pit, but it's worth it. Mix the plum slices with the flour, sugar, and vanilla. No, you don't need lemon or anything to enhance it - the tartness of the plums will be enough.
 Next: the assembly. Line a round 9" cake pan (or whatever you have handy) with parchment paper. I'm really lazy and tend to just crunch a big square of parchment down into the circular pan. There's no need for cutting out round shapes to fit or anything. At this point you smush down half of the crust mixture into the pan, leaving a slight lip around the edges which will eventually help keep the plums in place. Then dump in the plums and spread the slices around as evenly as you can manage. Finally, pinch off knobs of remaining crust dough to cover the damn thing.
As you can see, my dumb ass can't differentiate between plum varieties at the grocery store. Meh.

Stick it all in the oven for about 45 minutes (or until the crust has browned a little) and let cool for at least 10 minutes. At this point you can take the plumble out by inverting it onto a plate, and then repeating the practice onto your serving vessel of choice. Mmmm, lethargo-tastic.


Friday, July 13, 2012

Borgasm: part I

No, the title does not refer to a Star Trek porno - this is about burgers. Yesterday was a milestone for me: I hosted my first burger bbq. I know that sounds like an incredibly lame first, but let me explain. I always like doing things like satays, chops, and marinated veg on the grill because you end up feeding your guests things you've made. Something about just buying buns and frozen patties to turn out onto a grill seems like such a cop out to me. I'm not trying to hate on bbqs I've been to in the past, there's a time and a place for everything, but these shortcuts weren't happening at my first goddamn burgerpalooza. I figured that if I was going to do a burger spread, I would do it right. Over the next week I'll be posting tidbits which went into making the thing of beauty posted just above this paragraph. First off, the buns:
 In 2009 the New York Times ran a saliva-inducing article titled "The Perfect Burger and All Its Parts", which included a great recipe for light brioche buns from Comme Ca in Los Angeles. They were surprisingly easy to make despite the fact that I had to triple the recipe for my shindig. Also, I'm a shit baker - did I mention that before? If I can make them, you sure as hell can. They're fluffy, slightly sweet, and rich enough to make it matter but light enough to add cheese without wanting to vomit. In essence, far superior to any store or bakery bought burger bun I've ever tried. My way, exactly the way I did it, is written below and varies a bit from the published recipe in both method and measurement. If you don't trust my shifty eyes the original instructions are here

Light brioche buns
(makes 8 buns)

-1 cup warm water
-3 tablespoons milk
-2 teaspoons active dry yeast
-3 tablespoons raw sugar
-2 large eggs
-3 cups bread flour
-1/3 cup all-purpose flour
-1 1/2 teaspoons salt
-3 tablespoons unsalted butter
-egg wash  
  (1 egg beaten with a couple tablespoons of water)
-seeds to top


First mix the water, milk, sugar, and yeast in a cup and set it aside to foam up - 5 minutes should do it.
 While your yeast is waking up you can mix the two flours and salt together in a large bowl. Next Melt the butter and beat the melty goodness with the two eggs. Add the butter and eggs into the flour along with the contents of your yeasty cup. Mix it all together with your hands/wooden spoon/whatever until a dough forms.
 At this point you want to turn the dough out onto a well floured surface and knead+slap the crap out of it for 8 minutes. Then ball it back up, return it to the bowl, cover the bowl in plastic wrap and place it in a warm spot to double in size (the first rise). The original recipe says two hours, but I got away with it in an hour thanks to a warm July afternoon.
two batches - one before and another after the second rise
  Once the dough has doubled in size, split it apart into 8 equal balls and place them on a parchment paper covered baking sheet. Cover once again with plastic wrap  for another rise; it really helps to lightly oil the plastic to keep it from sticking to the dough. Deja vu: the original calls for a 2 hour wait but I only needed 1.

 Pre-heat an oven to 400 degrees, and place one rack in the middle and another at the very bottom. Place a pan filled with water on the bottom rack. While the oven heats up, brush your buns with egg wash and sprinkle on some seeds if you like. I used poppy and sesame seeds.
Bake the buns until they brown nicely, about 15 minutes. Be sure to turn the pan around half way through baking to ensure even browning. Once baked, cool on a rack and get ready to make some killer condiments.
In the next post I'll follow up with roasted jalapenos, rosemary carmelized onions, and of course: home made BACONNAISE.


Thursday, February 16, 2012

Om-nom-nomenclature

Being partially Polish has left me with strong ideas regarding what criteria do and do not constitute "sausage". For much of my life, if you had presented me with a meat patty and called it "country sausage" I probably would have just fixed my stare and slowly turned my head sideways (much like a confused dog). I suppose distinguishing ground meat from tubular ground meat really shouldn't be such a big deal. However, I am weird enough to have gone through a childhood phase of eating sausage casing while discarding the meat filling.

Yup.

Anyways, for the sake of my pointless and discriminatory food compulsions, I'm going to call these seasoned-but-nitrite-and-casing-free sausage meat lumps something else. Err, turkey-maple-something something.....

Squasage
(makes a dozen)

-1lb ground turkey
-1/2 lb ground pork
-2 tbsp caraway seeds
-1 tbsp ground corriander
-1 tsp paprika
-5 cloves of garlic
-1 medium onion
-1/3 cup maple syrup
-8 fresh sage leaves, minced
-1 tbsp fresh thyme leaves
-1/2 tsp ground black pepper
-2 tsp salt
-olive oil

Grate the onion and garlic into a large mixing bowl, then add in everything else except the oil. I use a mix of turkey and pork for taste and texture, but I think any white meat would do alright as long as you've got a bit of fat in it. Smush it all around with your hands until the ingredients are decently mixed, then leave for at least an hour for the flavors to properly mingle.
Pre-heat your oven to 450 degrees and shape 1/3 cup portions of meat into patties about an inch thick - keeping them relatively the same size will help them cook evenly. Place a large oven-proof pan over high heat with enough oil to thinly coat the surface. Once the pan is good and hot, go ahead and lay down your meat - it should begin to sizzle immediately. Make sure to not overcrowd the pan as you need ample space to turn the damn things as well as keep the pan from getting too cool. Spend a couple of minutes browning each side (shouldn't take more than 5 minutes total) and then stick the whole pan, uncovered, into the middle rack of the oven for 10 minutes. You may need to cook the entirety of the meat in a couple of batches if your pan isn't large enough, just make sure you wash off the burnt stuff in between batches or transfer your squasage to a baking sheet as the maple in the recipe will burn pretty easily with repeat performances.

After the 10 minutes remove the pan from the oven and serve them up. They're already pretty flavorful, but drizzling them with a concoction of maple syrup and dijon mustard (about equal parts each) makes for a pretty awesome finishing touch.

Saturday, January 14, 2012

Banana Cream Yes.

In the world of pies, banana cream is an understated champion. Banana cream pie is pretty weird in that it's a familiar concept but a rather uncommon find. It would seem that everyone has heard of it, but I can literally count the number of times I have encountered it outside of home on one of my hands. This has always puzzled me as it's such a pleasant blend of crunchy crust and creamy filling: not terribly sweet, always cold and satisfying. Essentially, it is the perfect end to a dinner, regardless of the season. I hope you all find this post particularly compelling as I've always been a pretty strong supporter of team cake. Despite this, banana cream pies make me cheer so hard for the other team it hurts. Cake may be my "Mr.Right", but banana cream pie has always been my "Mr.Right Now".


Ok I will stop the dumb analogies, you get the idea.


Banana Cream Pie

-1-2 bananas
(whatever it takes to cover your crust)

-Freshly gound nutmeg

crust
-2 cups almond flour
-4 tbsp sugar
-1/4 tsp baking soda
-pinch of salt
-1/4 cup butter
-1 large egg

custard filling
-2 cups milk
-1/4 cup corn starch
-1/2 tsp vanilla extract
-1/4 cup sugar
-5 large egg yolks
-1/2 tbsp butter
whipped topping
-1 1/2 cups whipping cream
-6 large marshmallows


Pre-heat your oven to 350 F and start by making your crust: combine almond flour, salt, sugar, and baking soda in a large bowl. Melt the butter, beat the egg, and mix both thoroughly into the dry ingredients. Grease a pie plate and smoosh this mixture into a somewhat even layer on the bottom and sides of the plate. Loosely cover the thing with either foil or parchment paper and stick it in the oven for about 30 minutes. After this you can uncover it and continue to bake for another 10-15 minutes. When it is done it will be a golden brown colour - don't worry if the edges are noticeably darker that its middle. Stick it somewhere to cool completely.


Okay, now on to the custard filling: mix the egg yolks, cornstarch, sugar, and vanilla. Whisk until it is visibly lighter in colour. Put the milk in a pot over medium heat - you want it to get very hot, but not quite to a boil. Once the milk is hot, pour about 1/2 cup of it into the egg mixture and whisk quickly to temper the stuff. Make sure you're quick, otherwise you end up with scrambled-shit eggs. Pour the tempered mixture back into the pot with the rest of the milk, and continue to whisk over medium heat. Within a couple of minutes it should form a thick custard. At this point you can take it off the stove, mix in the pat of butter, and set it somewhere to cool.

The whipped topping is pretty standard issue: drain the dairy into a large bowl and beat the crap out of it with an electric mixer or (if you are a skid like me) a whisk and your wanking muscles. For best results, try freezing your bowl for 10 minutes prior to whipping cream in it. When your cream starts to thicken but is not yet forming peaks, microwave the marshmallows for 20 seconds. Dump the marshmallows into the cream and immediately beat it all together until the cream forms soft peaks. Yes, whipped cream alone tastes just fine, but the gelatin in the marshmallows helps stabilize the cream.

Alright, finally: the assembly. Slice your bananas about 1/4" thick and arrange in an even layer at the bottom of your cooled pie crust. Shmear the custard on top of the bananas, then cover it all with large dollops of the whipped cream topping. Don't worry if your custard looks kind of lumpy when it's cooled, i tried both running it through a seive and just leaving it be, and honestly couldn't tell the difference. Grate some nutmeg over top and let the pie set in the fridge for at least an hour.

I've seen other recipes with banana flavouring added into the custard, but have never found it necessary. Given that this is such a remarkably light tasting dessert, the single layer of ripe banana slices imparts just enough flavour on it's own. Plus, you omit that weird artificial-banana aftertaste.

Saturday, November 19, 2011

Fat Butt Cheeks/Potatoes and Leeks

Who sucks at updating? oh, me! me! me! It seems like I've been starting most of my posts with some crappy apology for my lack of consistent blogging, so this time I'll just settle on an admission of guilt and get on with the damn thing.

I haven't been super motivated to cook the last few days as winter's chill sets in and all I want to do is watch reruns while huddling under a mass of blankets. However, I recently found myself in a very odd kind of convenience involving my "naked fat guy" halloween costume and my winter garden.
Let me explain. The production of my fat man "giblets" required two small potatoes for realistic heft-and-swing, leaving me with a bag of leftover spuds. Also, my garden is still going with a few winter crops, including leeks. It was clear...there was soup to be made. I don't care how goddamn pedestrian some critics may think potato and leek soup is, it's easy and delicious, which is why everyone should know how to make it.

Potato and Leek Soup

-3 fat leeks
-4 cloves of garlic
-5 sprigs of thyme
-1 lb potatoes
-3 celery stalks
-2 tbsp rendered bacon fat (or butter, whatever)
-5 cups of chicken stock
-1/4 cup heavy cream
-s&p to taste

Roughly chop your leeks, celery, and potatoes. You don't really need to chop the garlic, just smash and peel the cloves with your knife. I say "roughly chop" everything else because you're eventually going to take a blender to the lot. You can also make your life a little easier by tying the thyme together in a bundle with some kitchen twine.

Place the bacon fat (or whatever you're using) in a pot over medium-high heat, then add your leeks, celery, and garlic. Stir the stuff around every minute or two, and after 5 minutes or so the leeks will start to soften and the garlic may brown a bit. At this point you can pour in the stock and potato chunks. Bring it all to a boil, reduce the heat to medium, cover the pot, and let it all cook until the potatoes are fork tender - about 20 minutes.

Remove the bundle of thyme from the pot, add in the cream and let the soup cool for at least 10 minutes. Proceed to blend it all up with your weapon of choice - I am quite fond of my crappy immersion blender. I tend to like my soup with a creamy texture so I blend the crap out of it, but if you like lumps then by all means leave some be. Season with salt and freshly ground pepper to taste.

yup...that's it...brown-boil-blitz. Then return to your heap of blankets.


....aaaaaaand for those of you who have asked, I fashioned my wang from a half-empty tube of sensodyne toothpaste.

Saturday, September 10, 2011

not-so-arduous aubergines

Okay, here comes a pretty half-assed post because summer is still hanging around and I feel like I have better things to do than sit inside and write about how little I want to use my stove in 30 degree heat.

Blogging about something bbq seems a little blasé after having eaten nothing but for the last month or so. Instead I'm going to share a recipe for something vegetable-y and cooked in a pan rather than on a grill. It is cheesy and crispy though, so...calling it a veg outright seems kind of wrong.

Sorry buds, a bbq post will happen next week... right now I feel too sweaty and belligerent.

Breaded eggplant

-2 medium eggplants
-1 cup breadcrumbs
-1/2 cup cornmeal
-1/2 cup grated parmesan
-2 tbsp dried rosemary
(or italian seasoning, herbs de provence, whatever you like)
-1 egg
-2 tbsp water
-olive oil
-salt

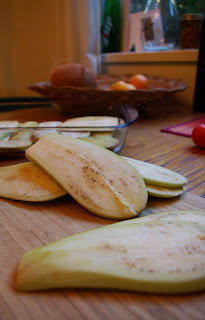
First peel the eggplants and slice them about 1/4" thick. I tend to choose eggplants on the smaller side for this recipe, as it makes slicing them evenly a bit easier. Grab a casserole dish or some other roomy vessel and lay down a single layer of eggplant slices. Sprinkle liberally with salt, and repeat this layering-salting process until all of your eggplant slices are used. Don't worry about oversalting: you aren't salting these to season them, but to draw water from the slices. Once the eggplants render out some water much of the salt will end up going with it. Leave the eggplant to, uh, "leak" for an hour. After this period of time you can drain the eggplant and pat the slices dry with with paper towels.
Mix the cheese, breadcrumbs, herbs, and cornmeal in a large bowl. In a separate bowl beat the egg with the 2 tbsp of water.

Start each slice by first dipping it in the egg and then patting it in the breadcrumb mixture to fully coat them. Try to keep one hand wet for dipping in egg and one hand dry for patting in breading...it'll make your life a lot easier.

Once all slices are breaded, simply put a pan over medium-high heat with one or two tablespoons of olive oil to lightly coat the bottom. Fry each batch of eggplant slices about 3 minutes per side or until each side has browned to your liking. Place each finished batch on a rack to cool, laying them on paper towel as so many people are oft to do will leave them a soggy mess.

I find them best eaten as soon as possible, and with a good tomato sauce.

Saturday, July 9, 2011

Making Jam...trying to avoid "jammin'" puns.

Despite the fact that I have always lived in an urban setting, I have a freakishly active hunting-gathering instinct alive in the backwards and questionable depths of my psyche. U-pick berry farms recently opened their fields for harvest, meaning that it was high time for me to get my elbows out and put all of those hard working migrant labourers to shame.
Although my roomie and I put in a solid effort, our gluttonous berry consumption barely put a dent in the 27lbs of fruit I brought home. I ended up processing the rest into jam, jelly, and syrup for Italian sodas. Jam production can be a pretty simple affair: fruit, sugar, and pectin will do just fine. However, I maintain that my strawberry jam is well worth the extra effort and is the best I've had to date - not too sweet, and deep in flavor thanks to the aroma of vanilla and tannins of red wine.

Sweet Baby Jesus, This is Good Strawberry Jam

-8 cups strawberries
(the riper the better!)
-2 cups red wine
(I used a merlot, but you can use whatever you want)

-1 vanilla bean
-2 cups sugar
-2 packets of no-sugar-needed pectin
(I used the Bernardin stuff)
-2 tsp ascorbic acid, aka powdered vitamin C
(or 1/4 cup lemon juice, see addendum)

Wash+lop the leafy tops from your strawberries. I like big chunks of fruit in my jam so I just quarter the berries with a paring knife. If you like it pulpy then smush them in reasonably sized batches with a potato masher.
Add the wine, sugar, and vanilla into a large pot over high heat. If you've never used a vanilla bean before, just split it lengthwise with a sharp knife and scrape the blade across the split pod to get out that black, sticky goodness. It may ressemble the tar scraped out of an old bong, but I prefer using this stuff to bottled extract any day of the week. Whisk the mixture up a little to help break apart the vanilla and boil it all over high heat for 5-7 minutes. After this period of time you can check out the viscosity; the syrup should very lightly coat the back of a spoon.

Dump in the remainder of the ingredients and bring the mixture back to a boil. Keep it at a rolling boil for 1 or 2 minutes , then switch off the heat. Your jam should still be kind of runny at this point because it is still hot. If you are doubtful of its structural integrity just spoon a few drops onto a saucer, stick it in the freezer for a minute or two, and then check to see if it has gelled to your liking. If it hasn't for some weird reason, you can always add some more pectin to the pot (just make sure you bring it back to a boil for another minute or two before declaring it finished). Make sure you give the stuff a taste; if it isn't sweet enough for you proceed to gradually add in more sugar to taste.

Fill sterilized jars (see addendum for jar sterilization), and keep in a place away from direct sunlight for the months to come. If you find that you've got more liquid than fruit, just jar the excess as jelly. Great on toast - EVEN GREATER ON BRIE CHEESE!!!

Addendum for jar sterlization and ascorbic acid

You can usually find ascorbic acid (powdered vitamin C) in most health food stores and (duh) vitamin shops. I use it as a colour preservative, but it you don`t have any handy just use lemon juice or leave it out altogther. If you choose the latter, your jam will taste fine but might turn a sort of brownish colour after a few weeks.

Prior to filling, put your jars and lids in a big pot of water (enough to completely cover them) and boil the shit out of them for 10-15 minutes. Keep them warm right up until you fill them! Once you fill a jar, stick on the lid and let it sit for ...uh....some arbitrary number of hours. If the lid of the jar sucks into a slightly concave profile once it has cooled you`re all done! If for some reason they don`t vacuum seal, just boil the filled and sealed jars in water once again (with enough water to cover them as in the photo) for a few minutes and allow them to cool - they should seal the second time around.

I`m going to level with you though, I got lazy this year. I just ran the damn things through my dishwasher with some leftover sani-brew I had from cider making, and all seems to have gone just fine.